Configuring Single Sign-On (SSO)
Complexity Level: Advanced
Overview
Single Sign-On (SSO) allows portal users to sign in using their organization's existing identity system (such as Azure AD, Okta, or Shibboleth) instead of a separate username and password. This guide covers how SSO works in the Springboard and what information your organization's IT team needs to configure trust with your website.
Words used on this page
- SSO (Single Sign-On): A login method that lets users sign in once with their organization's account and access their portal without a separate password.
- Identity Provider (IdP): The system that verifies a user's identity (for example, Azure AD, Okta, Google Workspace, or Shibboleth).
- Service Provider (SP): Your Springboard-powered website — it accepts login information from the Identity Provider.
- SAML: The technical standard used to exchange login information between the Identity Provider and your website.
- Metadata: A set of configuration details that tells the Identity Provider how to communicate with your website.
When to Use This Feature
Use this section if you need to:
- Set up SSO for a portal on your website
- Provide your IT team with technical configuration details for their Identity Provider
- Understand what information is exchanged during SSO login
- Troubleshoot SSO configuration with your IT team
Step-by-Step Instructions
Setting Up an SSO Provider in Springboard
-
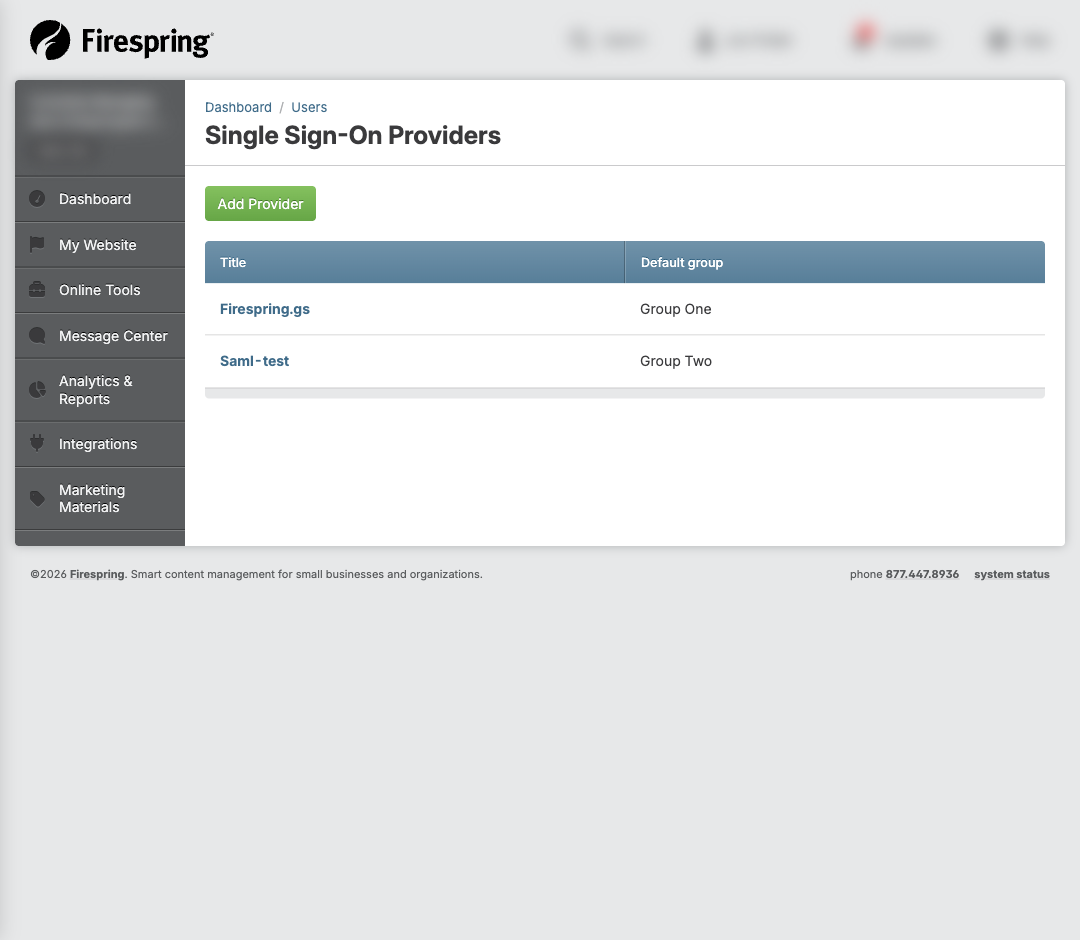
In the Springboard, navigate to Website Users > SSO Providers.
-
Click Add SSO Provider.
-
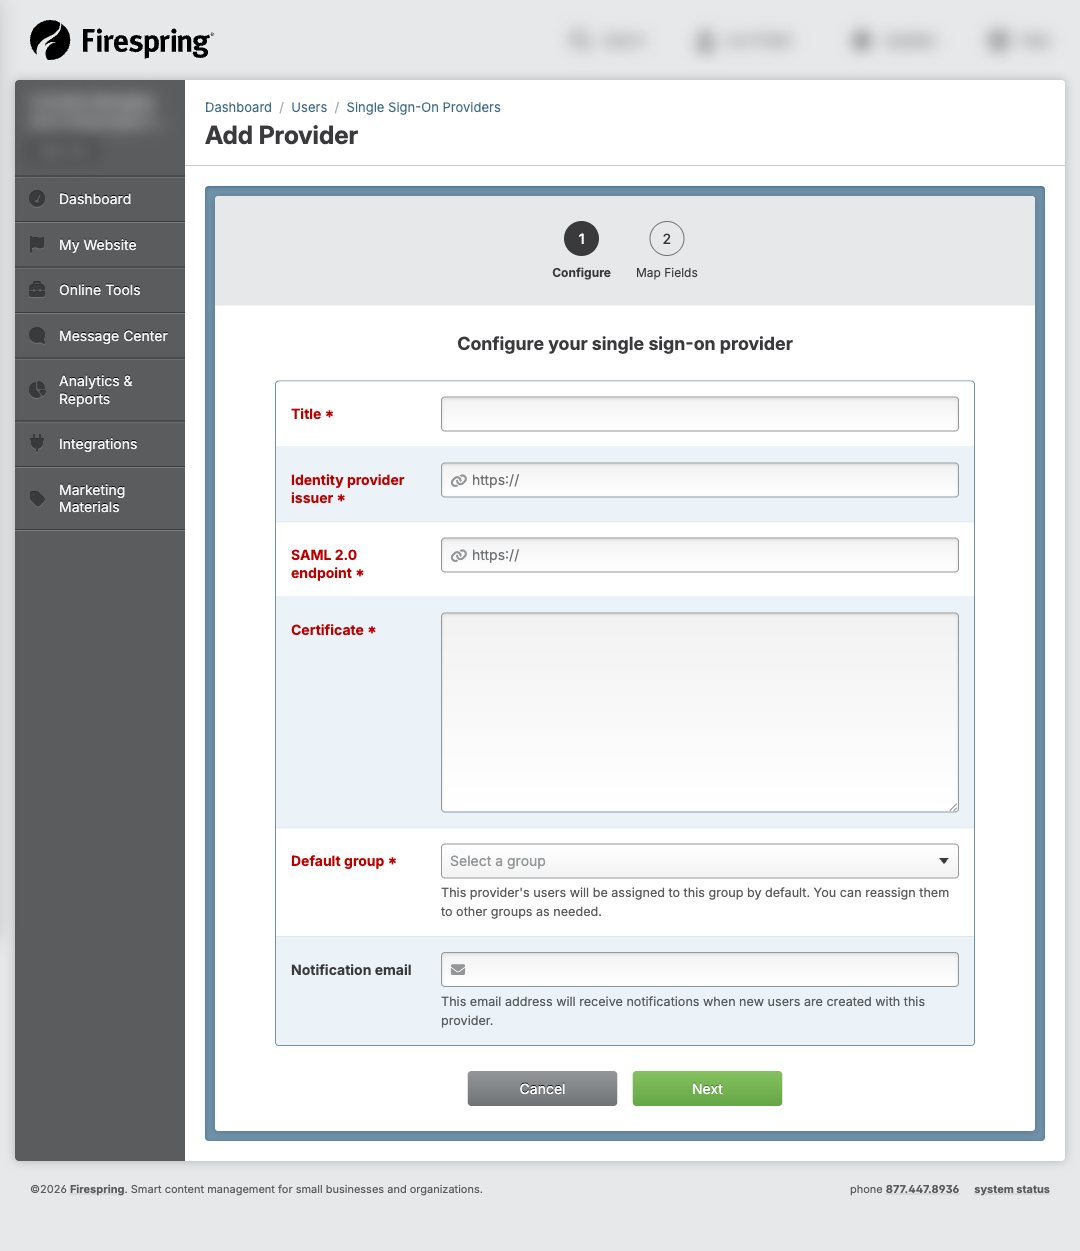
Fill in the required information:
- Title: A name for this SSO connection (for example, "Company Azure AD").
- Identity Provider Issuer: The unique identifier for your IdP (your IT team provides this).
- SAML Endpoint URL: The login URL for your IdP (your IT team provides this).
- Certificate: The public certificate from your IdP (your IT team provides this).
- Default User Group: The group new SSO users are automatically assigned to. Your SSO connection will need to have a unique group.
Add a new Group
To add a group, click My Website > Manage Groups (under Website Users). Click the green Add Group button. Enter a Title for your group (use the same name as your SSO connection to make it easy), then click Save & Finish. Assign any existing SSO users to this group. Navigate to the Portal this group should have access to, and click Manage Users & Groups. In the Group tab, locate your SSO Group, and click Add.
- Notification Email: This email address will be notified when new users are created with this SSO provider.
-
Click Next to create the SSO provider.
-
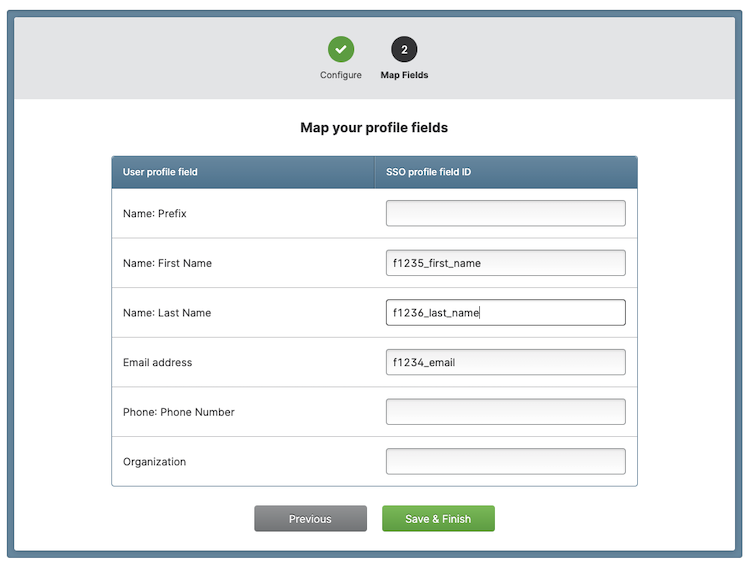
Choose which fields you want to map for your SSO Provider. Enter your field mapping details exactly as they have been provided for you by your SSO Provider.
-
Click Save & Finish.
Providing SP Metadata to Your IT Team
Your IT team needs the following details to configure trust on their Identity Provider. These are the same for every Springboard website — only the domain changes.
Update the domain, then copy and share with your IT team
Replace yourdomain.com with your actual website domain.
| Setting | Value |
|---|---|
| Entity ID | https://yourdomain.com/saml |
| Assertion Consumer Service (ACS) URL | https://yourdomain.com/saml/acs |
| ACS Binding | HTTP-POST |
| NameID Format | urn:oasis:names:tc:SAML:1.1:nameid-format:emailAddress |
| AuthnRequests Signed | No |
| Single Logout (SLO) | Not supported |
| SP Certificate | None (requests are not signed) |
| Required Attributes | Email address (sent as NameID) |
Additional attributes like first name, last name, or department are optional and can be mapped in the SSO Provider's field mapping configuration within Springboard.
Connect your Single Sign-On Provider to your Login Page
-
Click My Website > Website Content.
-
Locate the login page for the portal to which you'd like to connect your SSO Provider. This should be a unique login page specifically for this portal.
Create a new login page
Easily create a unique login page by locating your default Portal Login Page in the Portal Section of your site structure. Click the gear icon next to the Portal Login page, then click Copy. Enter a Page Title for your new login page (use the same title as your portal to keep things organized). Leave the rest of the settings in place, and click Save & Close.
-
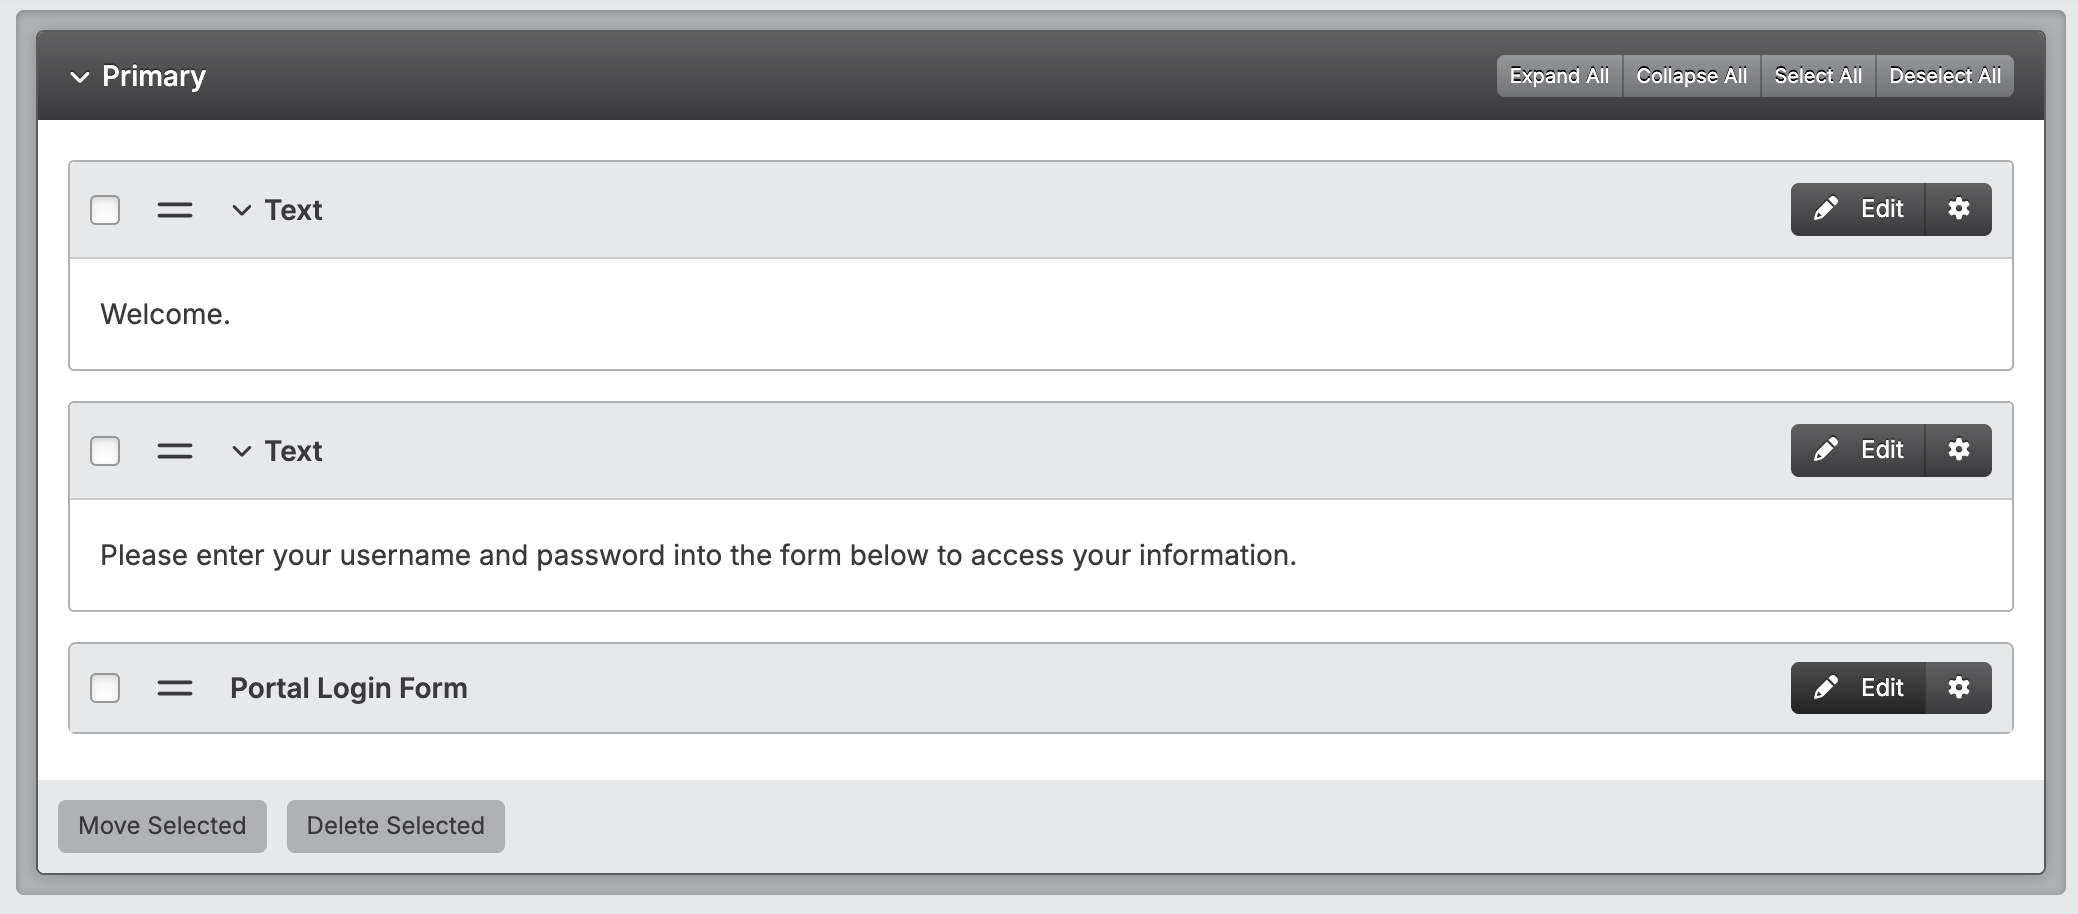
Click Edit next to the Portal Login Form content type.
-
Under Login Methods check the box next to your preferred Single Sign-On Provider. Only select one SSO provider per login page.

-
Update the Log In Button Label text if desired.
-
If your portal users will only be logging into this portal with SSO, you can deactivate the Username and Password option.
-
Click Save & Close.
Understanding How SSO Login Works
When a user clicks the SSO login button on your portal:
- Your website sends the user to your Identity Provider's login page.
- The user signs in with their organization credentials.
- The Identity Provider sends a secure response back to your website confirming the user's identity.
- The Springboard creates or updates the user account and signs them in to the portal.
If the user does not already exist in the Springboard, a new account is created automatically and assigned to the default user group you configured.
Tips & Helpful Guidance
- Your IT team initiates the IdP side. You provide the SP details from the table above; they configure their Identity Provider to trust your website.
- Test with one user first. Ask your IT team to test the connection with a single account before rolling out to all users.
- Check the notification email. When new users are created through SSO, you receive an email so you can verify the correct group assignment.
- NameID must be an email address. The Identity Provider must send the user's email address as the NameID value. Other formats are not supported.
- One SSO provider per portal. Each portal can have one SSO provider assigned. If you need multiple IdPs, create separate SSO providers and assign them to different portals.
Troubleshooting
Common Issue 1: User gets an error after signing in with their IdP
This usually means the Identity Provider's configuration does not match the SP details above. Ask your IT team to verify:
- The ACS URL is exactly
https://yourdomain.com/saml/acs(no trailing slash) - The NameID format is set to email address
- The IdP certificate in Springboard matches what the IdP is actually using
Common Issue 2: IT team asks for a metadata URL or XML file
Your website does not currently expose an automated metadata URL. Provide the table from the "Providing SP Metadata to Your IT Team" section above — this contains all the information needed to configure trust manually (the IdP administrator's "option 3").
Common Issue 3: Users are created but assigned to the wrong group
Check the Default User Group setting on the SSO Provider. All new users created through SSO are assigned to the coordinating group. You can change a user's group after they are created by editing their account in Website Users.
Common Issue 4: SSO user cannot access certain portal sections
SSO users follow the same permission rules as other portal users. Check that the user's group has access to the portal sections they need. Navigate to Website Users > Groups to review group permissions.